We deliver worldwide
5 Tips for Embroidery Beginners

Curious to learn embroidery but not sure where to start? What are some things you should consider before starting to stitch? Learning to embroider is not as difficult as it might seem. In fact, you can create beautiful artwork and decorations with just a few simple stitches. Judit Gummlich, the author of Embroidery on Knits shares five tips to get started.

1. Use the tools and material you already have
Tools and materials can provide endless inspiration for embroidery. For some, it can be easy to get distracted by needing a specific item in order to get started, be that an upgrade or different device. However, the right tools and materials are the ones in front of you, the ones you have, because they are already yours.
The most basic tools you need to get started are an embroidery hoop, needle, water soluble stabilizer, thread, scissors and a knitted fabric to stitch on. Many of these you will find from your home. If not: ask friends or family! Someone might be able to lend you something for the first few tries.

2. Choose the right thread
If you are just beginning your embroidery adventure, it is a good idea to do the bulk of your embroidering with a thread made of the same fibre as the fabric you are embroidering. This means if you are embroidering on a woollen garment, use mostly woollen thread to embroider with, if cotton, use cotton. It is also a good idea to use a similar yarn weight, e.g. a very thin thread used on thick fabric can lack impact or simply disappear. Yarn scraps, which almost every knitter has at home, are ideal for all types of embroidery on knits.
Of course, there are always exceptions, especially when it comes to creative endeavours. The more skills you gain, the more experiments you can make with different kinds of yarns and weights.

3. Use a water-soluble embroidery stabilizer
Water-soluble embroidery stabilizer does just what its name suggests, it helps to hold the fabric stable during embroidery. Once the embroidery work is complete, the stabilizer is washed out, dissolving completely in lukewarm water. You can also easily trace your embroidery design on the stabilizer to use it as a guide for your stitches, making it easier to achieve the wanted outcome.

4. Adjust your embroidery hoop
Keep adjusting your embroidery hoop as you work on your stitches to keep the tension on the fabric. You also want to avoid permanent marks or stretching on your fabric, especially if you are working on a garment. Remove the hoop when you are not working on your project for a longer period of time.

5. Avoid knots
Except for a couple of exceptions, knots are not your friend when it comes to embroidery. While decorative knots (such as French Knots) on the front, and the tiny one(s) you should make on the back before weaving in ends have their place, others do not. As you start and finish a length of thread, knots might be tempting and seem like a quick solution, but they are not necessary or even beneficial when embroidering on garments as they can make your work bulky. In her book, Judit shows a better and more durable method.
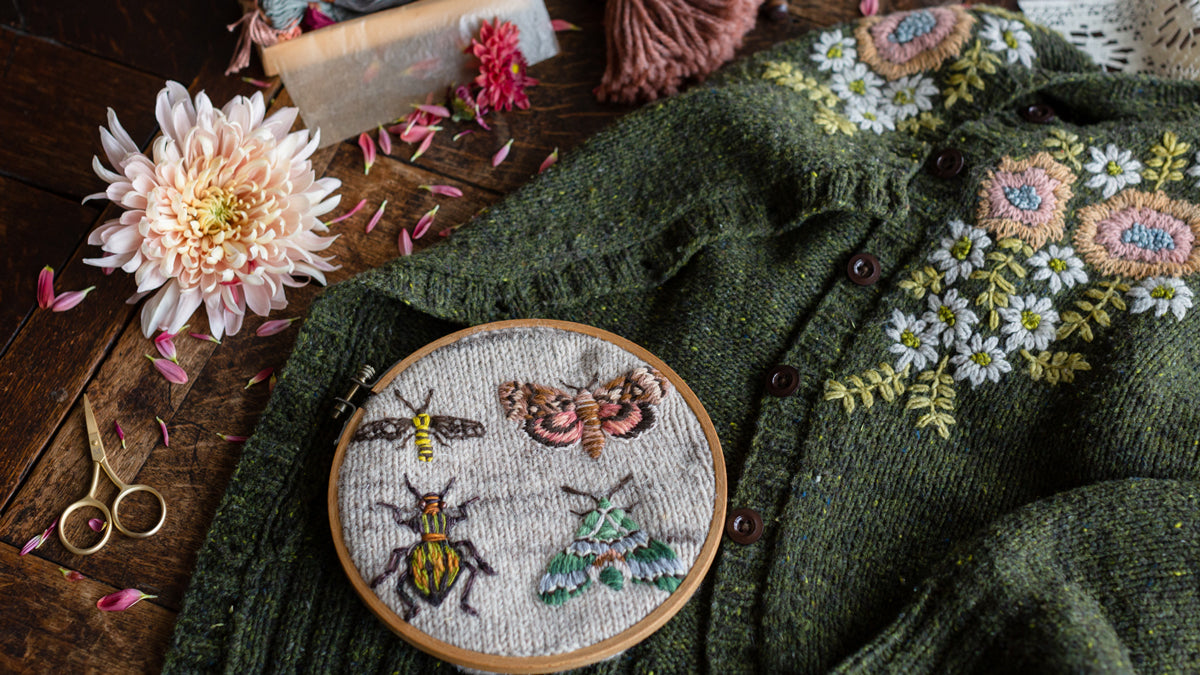
Ok, ready to start stitching? For endless inspiration and and step-by-step instructions, take a look at Judit's Embroidery on Knits to get started! The book introduces you to contemporary stitching with and on wool, explaining every step of the process — from planning to finished project. The book features 18 nature-inspired templates, generously complimented by insightful tips and ideas on how to use them.
Learn more:
Embroidery on Knits
Project Previews for Embroidery on Knits
Judit Gummlich – Celebrating Wool Embroidery
5 Tips for Mending


1 comment
I have ordered the book, but as I wait for it to arrive, could you please share the brand of water soluble stabilizer you prefer? I’d love to have it on hand when the book arrives so I can get right to work.